Πέμπτη 17 Σεπτεμβρίου 2015

Dream for Memories Trend Design Team

Hi everyone! Today I'm here with a new layout I designed for Memories Trend DT with the beautiful stuff that came in my kit. The photo I used is from my younger daughter's music concert with an amazing Greek children's choir, Rosarte.
The basic element of this layout is the circle. I used Sizzix framelits to create some circles of different sizes which I used as mats and as journaling spots. I also used a mask with pig polka dots for the background. So let's see the creative process!
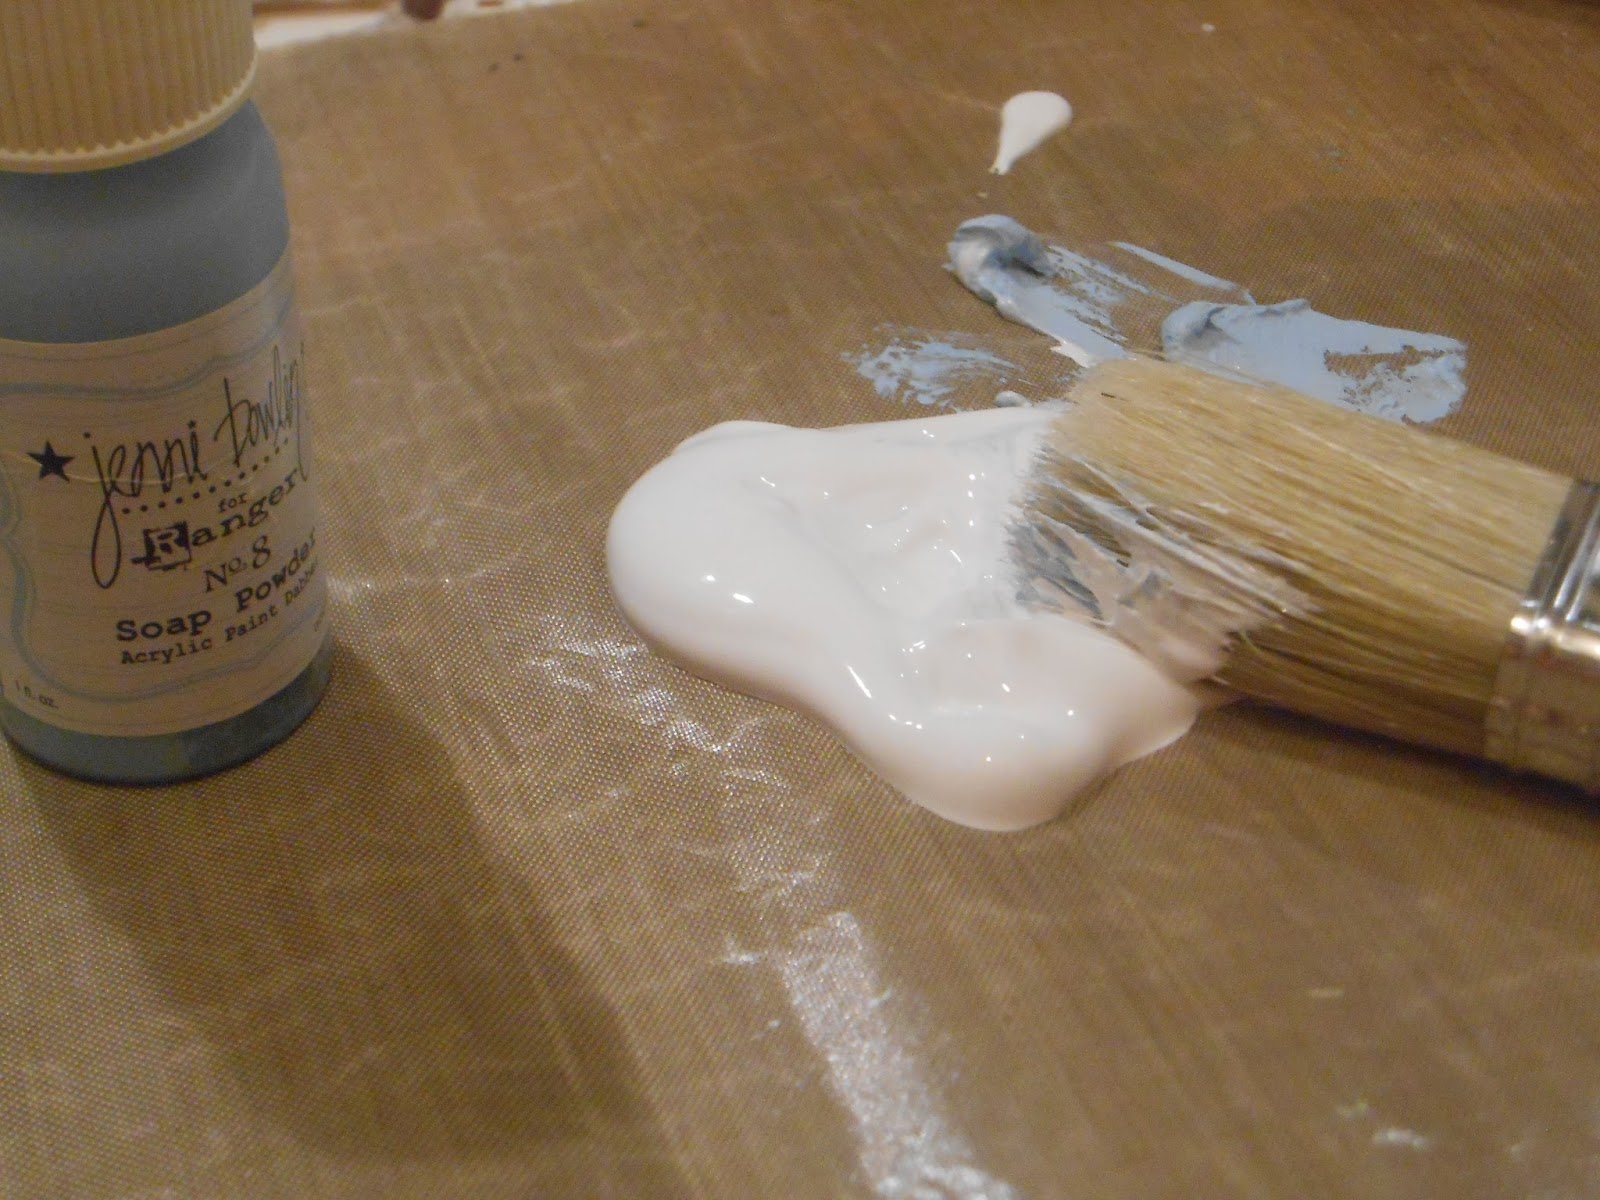
Firstly, I used the Swiss dot mask which I should say is a "must have" mask for mixed media backgrounds. It's so versatile! So I made some dotted spots using the mask and gesso. I also gessoed the edges of my patterned paper for a more distressed look.
Then with my Cuttlebug and Sizzix framelits (circles) (another versatile product with many uses) I cut 5 rings from patterned papers using 2 dies to create the borders for my journaling spots. Then I cut with the bigger one of the 2 dies the base of my journaling spots from ivory card paper. I also cut my photo using a bigger die and the photo mat from ivory card paper again. You can see the photos below.


For a more distressed look I stamped on the ivory paper using La Blanche music fragment stamp and Robin's egg ink pad. I also used this beautiful ink to distress the edges of my circles, the die-cut leaves, the white flowers and the letters of my title.
After stamping on the journaling spots I glued the border rings.
The song lines that you see under the photo are part of the photo.


The products that I used are listed here:

You can visit Memories Trend store and find everything you need from the list above. I hope that you got some inspiration today. Thank you for your visit! I would love to read your comments! Have anice day and keep creating!

Δευτέρα 10 Αυγούστου 2015

Two new cards

Hello everyone! I'm back today with two cards and a little tutorial for a shaker card. They are both designed for Memories Trend Design Team.
Do you like them?


The first one is pretty simple. I used a lovely Sizzix die to create it, plain color cardstock in various colours, a border punch, a piece of craft cardstock which I distressed for the background, a round corner chomper and a white gel marker.

For this card I used:
Sizzix die trailer
Kaisercraft Honey Chai Paper pack
- White, light green and craft cardstock
Cropadile corner chomper
Martha Stewart border punch
Crafty foam tape
- Distress inks (broken china, faded jeans, shabby shutters, peeled paint)

The second card is a shaker card (it has a gap between two transparencies where you can put beads or other little things that move when you shake the card). You can see the instructions below.

Here are the cardstocks' and transparencies' measurements in inches.


You glue your patterned paper on the white cardstock. Then you find the center and you draw a 3' diameter circle and you cut it with a cutting knife.


You put the cardstock with the opening on the base of your card (the front piece of the card), you draw a same circle and you cut it with a cutting knife.

Then you take the cardstock with the patterned paper and you glue one of your transparencies on the back of it.

After that you cut little pieces of your foam tape and you glue them around your circle so that you don't leave any gaps.

When you finish with that you take little beads, sequins or whatever you want (you can also put glitter) on your transparency trying to put them away from the perimeter of your circle.


Then you glue the second transparency on the upper side of the foam tape. Afterwards you put glue behind the second transparency and you glue all this "sandwich" on the base of your card like you see below.


You can trim your circle with a ribbon or a cord using your glue gun.


After that I glued a white piece of cardstock on the inside of my card and I stamped a flower bouquet from this beautiful Sizzix stamp and die set on the center of the cardstock. I coloured the image with my Copic markers. Then I stamped the flower border on another piece of white cardstock, I coloured the image and I cut 3 roses and 3 leaves with the cutting dies (I used the little dies to cut the elements separately). With these I decorated the cover of my card.


For this card I used:
- White and light green cardstock

I hope you liked my cards and got some inspiration! Thank you for the visit! I would love to see your comments! Have a nice week!

Σάββατο 18 Ιουλίου 2015

By the sea mini album

Hello everyone! I hope you are doing fine! Here in Athens we have to face very high temperatures, a little bit complexed financial troubles and unfortunately some terrible fires since yesterday. But we'll go along, I'm sure!

Today I'll show you a beautiful and very summery mini album in a box which I created with the wonderful Graphic45 papers that Memories Trend has sent to me in the design team kit. You know how much I love G45 and I'm very happy with the final result of my project. So, without further ado, here is my mini album.


You can see that I fussy-cut many beautiful images, borders and cards from the papers and I also used the beautiful stickers to create some tags and decorate  the pages. I used Laura Denison's Stack the deck binding method which you can find in this post.

To create the box I recycled a card box from some greek rusks, I painted the inside with white gesso mixed with light blue acrylic paint and then used some PVA glue to decorate the outside of the box with my patterned paper. You can see the photos.


I cut the paper around the box to give it the original shape.


I cut two strips from the patterned paper to cover the bottom of the box (both inside and outside). To glue the paper I used the PVA glue.


Then I cover all the box with PVA glue to harden it.


Finally I distress the edges with blue Tim Holtz distress ink.


The first photos of this post show you how I decorated the box using fussy-cut pieces from the beautiful papers, eyelets, twine, pearls & beads, lace. You can use the instructions from a previous post to make the mini album. I tried not to make it very thick in order to be able to take it in and out of the box easily. I used die-cuts, seashells, lace, stickers, tags, punches to decorate my album. In order to create the pages I used plain cardstock to get the appropriate envelope size. You can see below what I did.


To create this album I used some beautiful products that came with my kit for Memories Trend design team. You can see the list below:

-Blue, light green, craft & yellow cardstock

With this mini album I also take part at Crafty life July's challenge which has "Sea" as theme.

I hope you got some inspiration! Thank you for visiting my blog! I would love to see your comments! Have a nice summery weekend!